Zapier integrates your schedule with 1000s of tools with no code
You can integrate your schedule with 1000s of other tools you may already use with our API, but did you know you can use Zapier and do it quicker and easier without any lines of code?
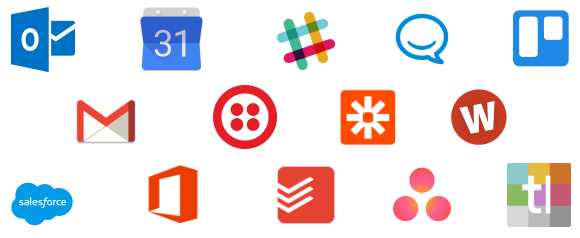
Our partnership with Zapier allows you to connect to many other tools you may already use like your communication tools, accounting software, Sales, HR and ERP software, and 1000s more.
Fully automated examples might include:
- add a person to Schedule it when they are added to your CRM
- add an event to Schedule it when a ticket/job/activity is added to your management tool
- add a holiday booking into your HR tool when a holiday is booked in Schedule it
- Send a message with your communications tool when an event is marked as completed in Schedule it
- Update an event in Schedule it when its progress or status is changed in your project management tool
- Allow remote people to book events via online forms and other booking tools.
The options are endless.
Search for any of the tools you want to integrate with using this link to Zapier and start sharing in minutes.
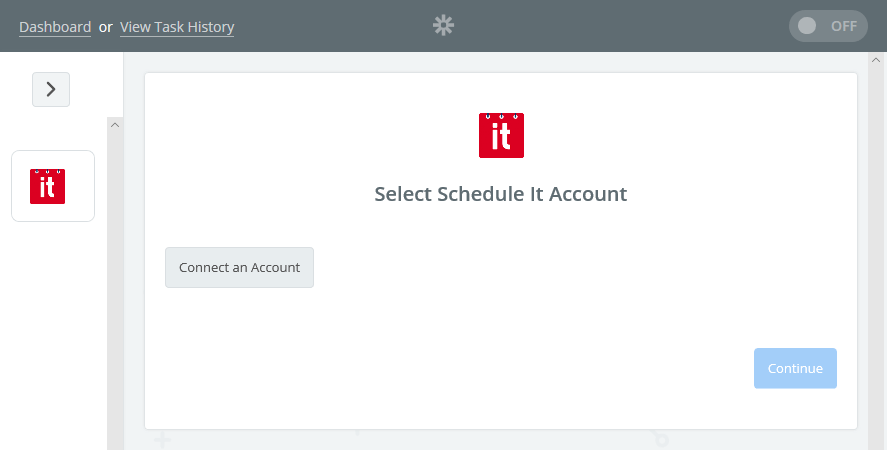
Before you can start using all the integrations between Schedule It and Zapier you will need to allow Zapier access. If you do not have a Zapier account you can create one free and access our Zap here. From within your Zapier account choose to Make New Zap and search for and choose Schedule It. After choosing a Trigger you will need to Connect an Account.
1, Once you have your Zapier account you can create a Zap for Schedule It. The first step is to connect to your account.
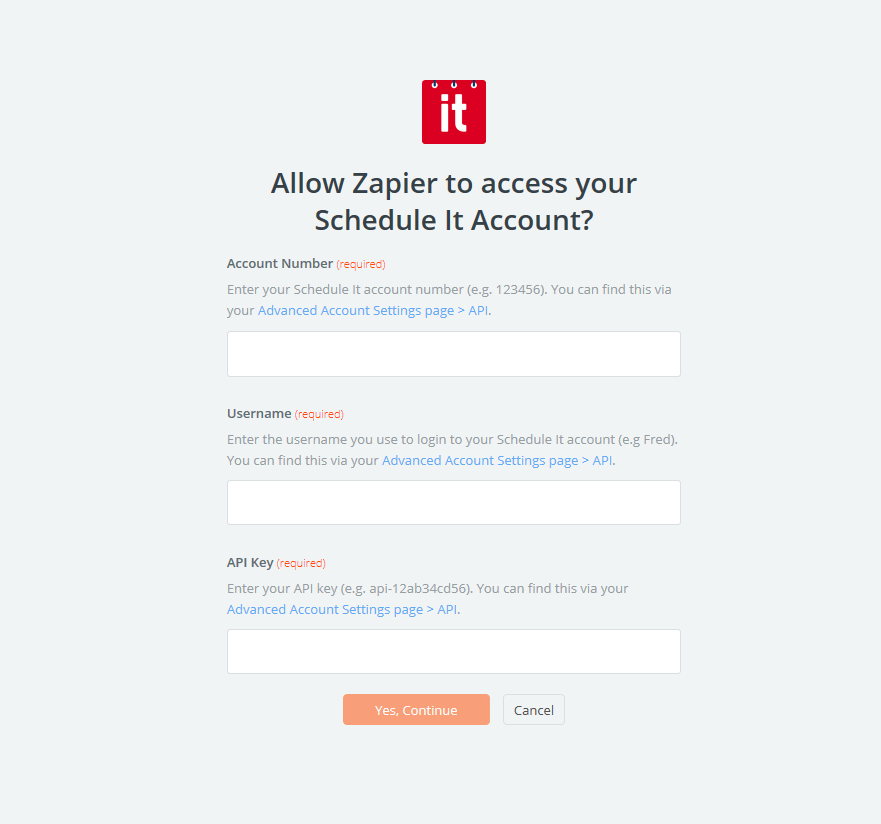
2, Enter your API login details. You can click the help link in the details of the login page which will take you to your Schedule It account where these are shown. Or visit manually your Advanced Account Settings > API page.
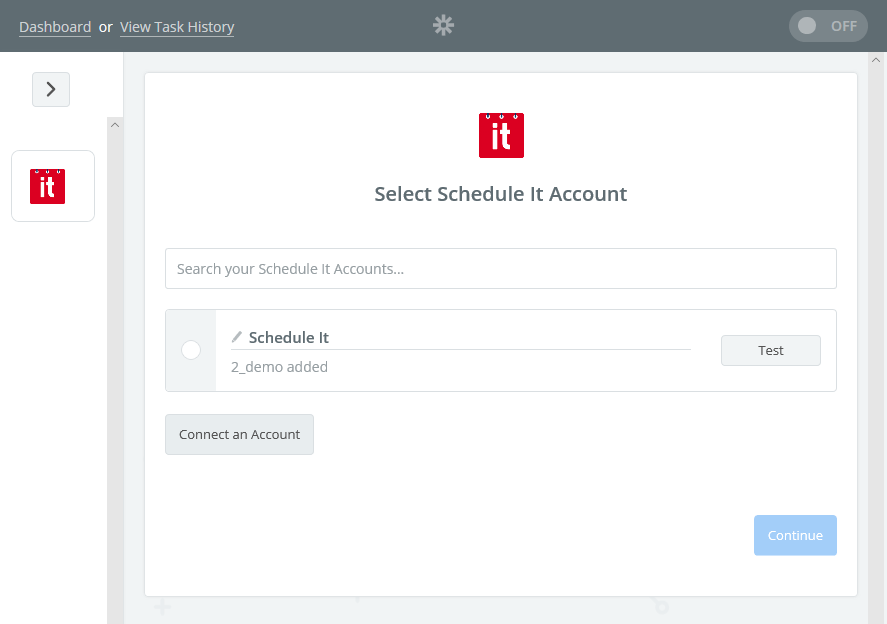
3, Your account should then show and you can press Test to confirm the connection.
Once you have connected Schedule it and Zapier you can now choose from 1000s of tools to integrate with using the very quick and simple no code solution from Zapier.
Our partnership with Zapier allows you to connect to many other tools you may already use like your communication tools, accounting software, Sales, HR and ERP software, and 1000s more.
Fully automated examples might include:
- add a person to Schedule it when they are added to your CRM
- add an event to Schedule it when a ticket/job/activity is added to your management tool
- add a holiday booking into your HR tool when a holiday is booked in Schedule it
- Send a message with your communications tool when an event is marked as completed in Schedule it
- Update an event in Schedule it when its progress or status is changed in your project management tool
- Allow remote people to book events via online forms and other booking tools.
The options are endless.
Search for any of the tools you want to integrate with using this link to Zapier and start sharing in minutes.
Zapier authentication
Before you can start using all the integrations between Schedule It and Zapier you will need to allow Zapier access. If you do not have a Zapier account you can create one free and access our Zap here. From within your Zapier account choose to Make New Zap and search for and choose Schedule It. After choosing a Trigger you will need to Connect an Account.
1, Once you have your Zapier account you can create a Zap for Schedule It. The first step is to connect to your account.
2, Enter your API login details. You can click the help link in the details of the login page which will take you to your Schedule It account where these are shown. Or visit manually your Advanced Account Settings > API page.
3, Your account should then show and you can press Test to confirm the connection.
Once you have connected Schedule it and Zapier you can now choose from 1000s of tools to integrate with using the very quick and simple no code solution from Zapier.
Still need help? Contact Us
Join Us - Live Webinar
...
Close
Help Topics
Search
Contact Us