
Single Sign On (SSO) OIDC using Google
The following steps guide you through creating a custom application integration between Schedule it for user login authentication.
Sign in to the Google portal :
From the Schedule it Account Settings > Single Sign On (SSO) page, click the Azure link to populate the SSO form with the initial details.
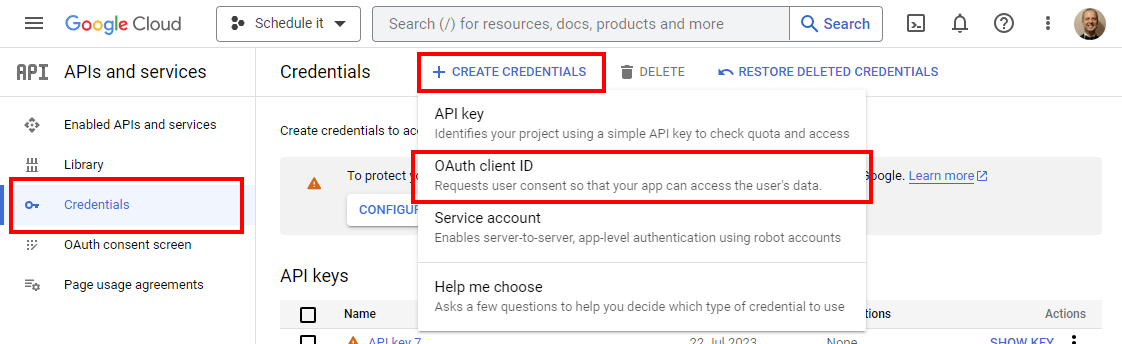
In Google select Credentials > Create Credentials > OAuth Client ID Set the Application Type as Web Applications Enter the name, Schedule it SSO, and choose a workspace where it can be used. Add the Redirect URL from your Schedule it Account Settings > SSO > Redirect URL. Click Create.
Copy the Client ID and paste into your Schedule it Account Settings > SSO > Client ID. Copy the Client Secret and paste into your Schedule it Account Settings > SSO > Client Secret. Save your Schedule it settings.
Update each of your Schedule it users SSO details to include their SSO ID from your provider.
If you are unsure of the ID provided by your SSO provider, then you can attempt a login (from your Redirect URL)which should show the ID provided.
Sign in to the Google portal :
Create a new app integration
If you are unsure of the ID provided by your SSO provider, then you can attempt a login (from your Redirect URL)which should show the ID provided.
Still need help? Contact Us

Join Us - Live Webinar
...
Close
Help Topics
Search
Contact Us